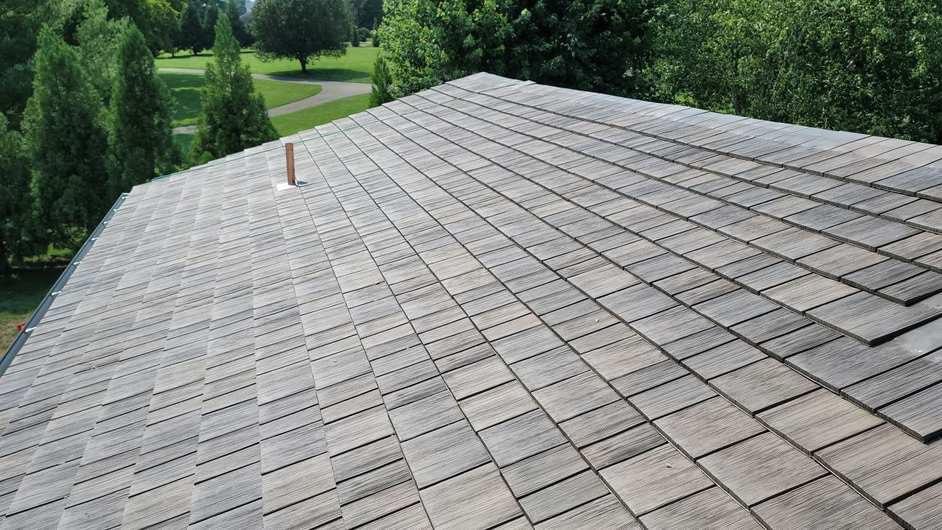
How To Prevent Ice Dams On Your Roof

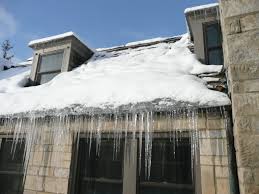
Winter’s beauty can quickly turn treacherous when thick ridges of ice begin forming along your roof’s edge, creating a frozen barrier that prevents melting snow from draining properly and forces water to back up under your shingles and into your home. Ice dams represent one of winter’s most destructive and expensive roofing problems, capable of causing thousands of dollars in damage to roofing materials, insulation, ceilings, and walls while creating perfect conditions for mold growth that can persist long after the ice has melted. While many homeowners don’t realize they have an ice dam problem until water starts dripping through their ceilings or icicles grow to dangerous proportions, the most effective approach involves understanding the underlying causes and implementing prevention strategies that eliminate the conditions allowing ice dams to form—rather than waiting until you need an emergency ice dam removal company to address an existing problem that’s already causing damage.

Understanding the Science Behind Ice Dam Formation

Ice dams don’t form randomly or simply because of cold weather—they develop through a specific sequence of conditions that homeowners can understand and control. Recognizing this process empowers property owners to address the root causes rather than just treating symptoms after damage has already occurred.

The Heat Loss Cycle

Ice dams begin when heat escapes from your home’s interior into the attic space, warming the roof deck above the heated portions of your house. This heat causes snow on the upper sections of your roof to melt, creating water that flows down toward the colder roof edges where outdoor temperatures keep the roof surface frozen. When this flowing water reaches the cold edge areas, it refreezes and gradually builds up into the characteristic ice ridge that blocks further drainage.

Critical Temperature Zones

The most problematic ice dam conditions occur when attic temperatures rise above 32 degrees Fahrenheit while exterior temperatures remain below freezing. This temperature differential creates the melting and refreezing cycle that builds ice dams over time. The greater the temperature difference between your attic and the outdoor air, the more rapidly ice dams can develop and the larger they can grow.

Roof Design Factors

Certain architectural features make homes more susceptible to ice dam formation. Complex roof lines with multiple valleys, dormers, and level changes create areas where snow accumulates more heavily and drainage becomes complicated. Low-slope roof sections, particularly those facing north, tend to retain snow longer and experience more severe ice dam problems. Understanding these design vulnerabilities helps homeowners focus prevention efforts on the most critical areas.

Comprehensive Insulation and Air Sealing

The most effective ice dam prevention strategy involves creating a thermal barrier that prevents heated interior air from warming the roof deck. This approach addresses the fundamental cause of ice dam formation rather than attempting to manage the symptoms after they appear.

Attic Insulation Optimization

Adequate attic insulation creates a thermal barrier that keeps heated air in your living spaces rather than allowing it to escape into the attic and warm the roof deck. Current building standards recommend R-38 to R-60 insulation levels for most climate zones, but many older homes have insufficient insulation that allows significant heat transfer. Adding insulation or upgrading existing insulation to current standards dramatically reduces the heat loss that drives ice dam formation.

Air Leakage Elimination

Even with adequate insulation, air leaks can allow warm air to bypass insulation barriers and directly heat roof surfaces. Common air leak sources include recessed lighting fixtures, electrical outlets, bathroom fans, plumbing penetrations, and gaps around chimneys or other roof penetrations. Professional air sealing focuses on these critical areas using appropriate materials and techniques that create lasting barriers against unwanted air movement.

Vapor Barrier Installation

Proper vapor barriers prevent moisture-laden interior air from reaching cold surfaces where it can condense and create humidity problems that complicate ice dam prevention efforts. These barriers must be installed correctly to avoid trapping moisture within building assemblies, making professional installation advisable for optimal performance. Effective vapor barriers work in conjunction with insulation and air sealing to create comprehensive thermal control.

Ventilation System Design and Management

Proper attic ventilation works in conjunction with insulation and air sealing to maintain consistent roof temperatures that prevent the melting and refreezing cycle responsible for ice dam formation.

Balanced Ventilation Principles

Effective attic ventilation requires balanced intake and exhaust ventilation that promotes continuous air circulation without creating pressure imbalances that could interfere with building envelope performance. Soffit vents provide intake air at the lowest portions of the roof, while ridge vents, gable vents, or powered exhaust fans remove air at higher elevations. This circulation pattern helps maintain consistent attic temperatures that mirror outdoor conditions rather than interior heating.

Ventilation Capacity Requirements

Building codes typically require one square foot of ventilation area for every 150 square feet of attic space, with this ventilation split evenly between intake and exhaust locations. However, homes in severe winter climates may benefit from additional ventilation capacity that provides more aggressive temperature control during critical ice dam formation periods. Professional assessment can determine optimal ventilation requirements for specific roof configurations and climate conditions.

Ventilation Obstruction Prevention

Insulation installation must not block soffit vents or other intake ventilation, as blocked vents eliminate the air circulation necessary for temperature control. Proper installation techniques include ventilation baffles that maintain clear air pathways while allowing maximum insulation coverage. Regular maintenance ensures that debris, bird nests, or other obstructions don’t compromise ventilation effectiveness during critical winter periods.

Roof Surface and Drainage Management

While addressing heat loss represents the primary prevention strategy, roof surface management and drainage improvements provide additional protection against ice dam formation and minimize damage when prevention measures aren’t completely effective.

Snow Load Management

Excessive snow accumulation creates the raw material for ice dam formation and increases the potential severity of resulting problems. Roof rakes allow safe removal of snow from roof edges while standing on the ground, reducing the snow load available for melting and refreezing. However, snow removal must be done carefully to avoid damaging roofing materials or creating safety hazards from falling ice or snow.

Drainage System Maintenance

Clean, properly functioning gutters and downspouts help remove melting snow before it can refreeze at roof edges. However, gutters can also contribute to ice dam problems if they become clogged with ice or debris that blocks drainage. Some homeowners choose to remove gutters entirely in areas with severe ice dam problems, allowing melting snow to drain directly off the roof rather than accumulating in frozen gutters.

Heat Cable Systems

Electric heat cables installed along roof edges can prevent ice formation in critical drainage areas, but they represent a treatment approach rather than true prevention. Heat cables require careful installation to avoid fire hazards and must be maintained regularly to ensure safe operation. While heat cables can be effective for specific applications, they increase energy costs and don’t address the underlying heat loss problems that cause ice dam formation.

Professional Assessment and Solutions

Complex ice dam problems often require professional expertise to identify all contributing factors and develop comprehensive solutions that address both immediate concerns and long-term prevention goals.

Thermal Imaging and Analysis

Professional assessment often includes thermal imaging that reveals heat loss patterns and identifies specific areas where improvements are needed. These thermal images show exactly where heated air is escaping into attic spaces and causing roof surface warming that contributes to ice dam formation. This diagnostic information helps prioritize improvement efforts for maximum effectiveness and cost efficiency.

Integrated Solution Design

Effective ice dam prevention typically requires coordinated improvements to insulation, air sealing, and ventilation systems that work together to control roof surface temperatures. Professional contractors can design integrated solutions that optimize performance while avoiding conflicts between different building systems. This comprehensive approach ensures that prevention measures work effectively together rather than creating new problems.

Emergency Intervention Planning

Even with effective prevention measures, extreme weather conditions or equipment failures can sometimes create ice dam problems that require immediate attention. Establishing relationships with qualified ice dam removal companies before problems occur ensures that emergency services are available when needed. Professional removal services possess the specialized equipment and techniques necessary to safely remove ice dams without causing additional roof damage.

Ice dam prevention requires understanding the fundamental causes of ice formation and implementing comprehensive solutions that address heat loss, ventilation, and drainage issues. While prevention requires initial investment in insulation, air sealing, and ventilation improvements, these measures provide long-term protection that far exceeds the cost of repeatedly dealing with ice dam damage and emergency removal services. Proactive prevention protects both your property investment and your family’s comfort throughout even the most severe winter conditions.
What To Do When You Have a Sewage Backup In Your Home

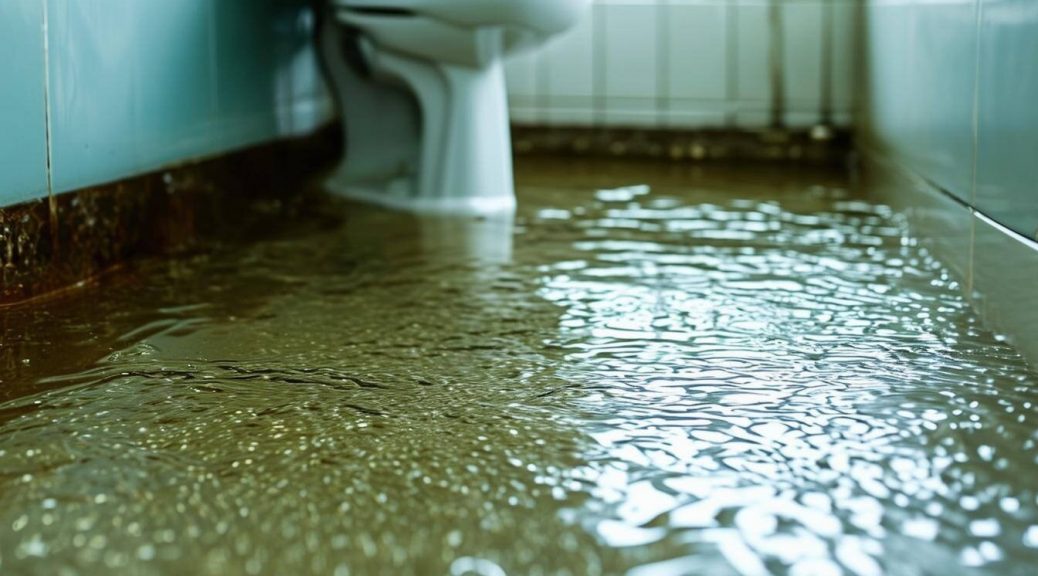
Few home emergencies are more devastating, disgusting, and potentially dangerous than discovering raw sewage flowing into your living spaces, transforming your safe haven into a hazardous environment that threatens both your property and your family’s health. The overwhelming smell hits you first, followed by the horrifying realization that contaminated water is spreading across your floors, soaking into carpets, and potentially infiltrating walls and subflooring where it can cause lasting damage and create serious health risks. While your first instinct might be panic, knowing exactly what steps to take in the critical first hours after a sewage backup can mean the difference between a manageable cleanup and a catastrophic situation that requires extensive reconstruction—and in severe cases, the expertise of a professional water damage restoration company to safely restore your home to livable conditions.

Immediate Safety and Health Priorities

When sewage backs up into your home, your family’s safety must take absolute precedence over property concerns. Sewage water contains dangerous bacteria, viruses, and parasites that can cause serious illness through contact or inhalation, making proper safety protocols essential from the moment you discover the problem.

Evacuate and Secure the Area

Remove all family members and pets from affected areas immediately, as sewage contamination poses immediate health risks that increase with exposure time. Children, elderly family members, and individuals with compromised immune systems face particularly severe risks and should be kept away from contaminated areas until professional cleanup is complete. Establish a clean entry point to your home that bypasses affected areas, and avoid tracking contamination to unaffected rooms.

Protect Yourself During Assessment

If you must enter contaminated areas to assess damage or shut off utilities, wear protective equipment including rubber boots, waterproof gloves, and a face mask or respirator. Eye protection prevents splash contamination, while covering exposed skin reduces the risk of bacterial infection through cuts or abrasions. Remember that sewage contamination becomes airborne during agitation, making respiratory protection essential even for brief exposure periods.

Document for Insurance Purposes

Take photographs and videos of the damage from safe vantage points before beginning any cleanup efforts, as this documentation will be crucial for insurance claims and potential litigation. Focus on water levels, affected areas, and damaged belongings while maintaining safe distances from contaminated materials. This initial documentation establishes the scope of damage before cleanup efforts potentially alter the scene.

Stopping the Source and Preventing Further Damage

Identifying and addressing the source of sewage backup prevents additional contamination while you develop a comprehensive cleanup strategy. Quick action to stop the flow minimizes damage and reduces the scope of required remediation.

Utility and Water System Controls

Locate and shut off the main water supply to prevent additional water from entering the sewage system if the backup results from municipal system problems or blockages in your home’s main drain line. Turn off electricity to affected areas at the circuit breaker level, as sewage water and electrical systems create deadly combinations that pose electrocution risks. Gas appliances in contaminated areas should also be shut off if water levels could affect pilot lights or electrical components.

Drain and Plumbing System Assessment

Avoid using any plumbing fixtures connected to the affected drain system, including toilets, sinks, washing machines, and dishwashers, as continued use will worsen the backup and spread contamination. If the backup appears to result from a blockage in your home’s system rather than municipal problems, contact a qualified plumber immediately to assess and clear the obstruction. Municipal backups require coordination with local authorities who can address system-wide problems.

Preventing Cross-Contamination

Establish clear boundaries between contaminated and clean areas using plastic sheeting or other barriers to prevent tracking sewage throughout your home. Remove or protect uncontaminated belongings in adjacent areas, as sewage contamination can spread through air currents, foot traffic, and contact transfer. Consider this containment phase crucial for limiting the ultimate scope of required cleanup and restoration.

Water Removal and Initial Cleanup

Once you’ve addressed immediate safety concerns and stopped the source of contamination, removing standing sewage water becomes the priority for preventing additional absorption into building materials and reducing ongoing health risks.

Safe Water Extraction Methods

Standing sewage water requires immediate removal, but the contaminated nature of this water demands extreme caution during extraction. Submersible pumps designed for contaminated water can remove large volumes quickly, but personal protective equipment remains essential throughout the process. Wet vacuums specifically rated for sewage cleanup can handle smaller volumes, but standard household vacuums should never be used as they can spread contamination through their exhaust systems.

Contaminated Material Removal

Porous materials that have absorbed sewage contamination typically cannot be safely cleaned and must be removed and disposed of according to local hazardous waste regulations. This includes carpeting, padding, upholstered furniture, mattresses, and paper products that have contacted contaminated water. Drywall and insulation that have absorbed sewage also require removal, often extending several feet above the visible water line due to wicking action.

Surface Cleaning and Disinfection

Hard surfaces that can be salvaged require thorough cleaning with appropriate disinfectants designed for sewage contamination. Begin with physical removal of visible contamination, followed by cleaning with detergent solutions, and finish with EPA-approved disinfectants that are effective against the bacteria and viruses present in sewage. Multiple cleaning cycles are often necessary to achieve proper disinfection levels.

Professional Assessment and Restoration

Sewage backups often involve contamination levels and health risks that exceed safe DIY cleanup capabilities, particularly when contamination affects building systems, spreads to multiple rooms, or involves significant volumes of sewage water.

When Professional Help Becomes Essential

Extensive sewage backups, contamination of HVAC systems, or structural damage to building materials typically require professional water damage restoration companies with specialized equipment and training. These professionals possess industrial-grade extraction equipment, antimicrobial treatments, and drying systems that ensure complete remediation while protecting worker and occupant safety. Insurance companies often require professional documentation and certification for coverage of sewage backup claims.

Comprehensive Damage Assessment

Professional restoration companies conduct thorough assessments that identify all affected materials, including hidden contamination behind walls or under flooring that might not be apparent during initial evaluations. Moisture meters, thermal imaging equipment, and air quality testing help identify the full scope of contamination and ensure that remediation efforts address all affected areas rather than just visible damage.

Structural Drying and Restoration

Complete restoration requires industrial drying equipment that removes moisture from building materials before mold growth can begin. Professional restoration companies monitor moisture levels throughout the drying process and employ antimicrobial treatments that prevent bacterial growth in affected materials. This comprehensive approach ensures that your home returns to safe, healthy conditions rather than harboring ongoing contamination risks.

Insurance and Recovery Considerations

Sewage backups involve complex insurance considerations and recovery processes that benefit from professional guidance and documentation throughout the remediation process.

Insurance Coverage and Claims

Standard homeowner’s insurance policies typically exclude sewage backup damage unless specific coverage endorsements have been purchased. However, if the backup results from covered perils like storm damage to municipal systems, coverage might apply under different policy sections. Contact your insurance company immediately to report the claim and understand your coverage options, as delays in reporting can affect coverage availability.

Health Monitoring and Documentation

Family members exposed to sewage contamination should monitor for symptoms of illness and seek medical attention if gastrointestinal problems, skin irritation, or respiratory issues develop. Medical documentation of sewage exposure and any resulting health problems supports insurance claims and potential litigation while ensuring appropriate treatment for contamination-related illnesses.

Sewage backups represent serious emergencies that require immediate action to protect health and minimize property damage. While the scope of required response varies with the extent of contamination, prioritizing safety, stopping the source, and seeking appropriate professional help ensures the best possible outcome for both your family’s health and your property’s restoration to safe, livable conditions.

How To Know When Your Roof Is Damaged

Your roof works silently above your head, day and night, season after season, protecting everything you value from the relentless forces of nature—until suddenly it doesn’t. The challenge with roof damage is that it often begins subtly, with minor issues that gradually worsen over time until they become major problems that threaten your home’s structural integrity and your family’s safety. Unlike a broken appliance or visible plumbing leak, roof damage frequently develops in hidden areas where it can progress undetected for months or even years before finally announcing itself through dramatic ceiling stains, dripping water, or worse. Learning to recognize the early warning signs of roof damage empowers homeowners to take prompt action when repairs are still manageable and affordable, rather than waiting until emergency situations require extensive reconstruction that could have been prevented with timely intervention from a qualified roof repair contractor.

Visual Signs from Ground Level

Many indicators of roof damage are visible from ground level, allowing homeowners to conduct regular inspections without the safety risks associated with climbing onto rooftops. These external signs often provide the first clues that your roof needs professional attention.

Shingle and Surface Deterioration

Missing, cracked, or curled shingles represent obvious signs of roof damage that require immediate attention. Wind damage often removes shingles entirely, leaving exposed underlayment or roof decking vulnerable to water infiltration. Granule loss creates bald spots on asphalt shingles that appear as dark patches, indicating advanced aging or impact damage. Curled or cupped shingles suggest moisture problems or inadequate ventilation that could lead to more extensive damage if not addressed promptly.

Gutters and Drainage System Clues

Your gutter system often provides valuable information about roof condition through the debris it collects. Excessive granules in gutters indicate accelerated shingle deterioration, while pieces of shingle material suggest recent damage from severe weather or normal wear reaching critical levels. Damaged or overflowing gutters can also cause roof edge damage through ice dams or water backup that infiltrates roofing materials.

Structural Alignment Issues

Sagging roof lines, uneven ridge lines, or visible dips in roof surfaces indicate potential structural problems that extend beyond surface roofing materials. These alignment issues often result from water damage to roof decking, compromised support structures, or foundation settlement that affects the entire roofing system. Such problems typically require immediate professional assessment to prevent progressive structural failure.

Interior Warning Signs

Indoor indicators of roof damage often appear long before exterior damage becomes obvious, making regular interior inspections crucial for early problem detection. These interior signs frequently indicate that damage has already penetrated the roofing system and requires prompt professional attention.

Water Stains and Discoloration

Ceiling stains, even minor ones, indicate water infiltration that has penetrated through multiple layers of roofing materials. These stains often appear as brown or yellow discoloration that may seem minor but represent significant roofing system failure. Water stains in upper-level rooms or attics provide clear evidence of roof leaks, while stains near exterior walls might indicate flashing problems or ice dam damage.

Musty Odors and Humidity Changes

Persistent musty odors in upper levels of your home often indicate moisture infiltration that may not yet be visible as water stains. Unexplained increases in indoor humidity levels, particularly in attics or upper floors, suggest that water is entering through roof damage and creating conditions conducive to mold growth. These early indicators allow intervention before water damage becomes extensive enough to require major repairs.

Paint and Wallpaper Problems

Peeling paint, bubbling wallpaper, or other moisture-related interior finish problems near exterior walls or ceilings often result from roof leaks that haven’t yet created obvious water stains. These cosmetic issues frequently appear before more dramatic water damage becomes evident, providing early warning that roof repairs are needed to prevent progressive deterioration.

Attic and Upper Level Inspections

Attic spaces provide excellent vantage points for detecting roof damage before it affects living spaces below. Regular attic inspections reveal problems in their early stages when repairs are typically less extensive and expensive.

Daylight Penetration

Any visible daylight coming through roof materials indicates holes or gaps that allow both light and water infiltration. These openings might result from missing shingles, damaged flashing, or deteriorated roof penetrations around vents, chimneys, or other equipment. Even small light penetration points can allow significant water infiltration during rain events.

Insulation and Ventilation Problems

Wet or compressed insulation indicates water infiltration that has reached the attic level, while dark staining on insulation suggests ongoing moisture problems. Inadequate or damaged ventilation systems create conditions that accelerate roof material deterioration and can cause ice dam formation in cold climates. These ventilation problems often contribute to premature roof failure and require professional assessment to determine appropriate solutions.

Structural Element Condition

Exposed roof framing in attics allows direct inspection of structural elements for signs of water damage, rot, or insect infestation that could compromise roof integrity. Sagging rafters, water stains on wood framing, or soft spots in roof decking indicate structural problems that extend beyond surface roofing materials and require immediate professional evaluation.

Weather-Related Damage Assessment

Severe weather events create immediate roof damage risks that require prompt inspection and potential emergency repairs. Understanding how different weather conditions affect roofing systems helps homeowners recognize when professional assessment becomes necessary.

Post-Storm Inspection Protocols

After significant weather events including hail storms, high winds, or heavy snow loads, visual inspection from ground level can reveal obvious damage that requires immediate attention. However, many weather-related problems aren’t immediately apparent and develop over time as minor damage allows progressive water infiltration. Professional roof repair contractors possess the expertise and equipment necessary to identify subtle damage that might be missed during casual inspections.

Hail and Impact Damage

Hail damage often appears as bruised or cracked shingles, dented metal components, or damaged gutters and downspouts. However, the most serious hail damage frequently affects the protective granule layer on shingles without creating immediately obvious visual damage. This granule loss accelerates weathering and reduces the roof’s ability to shed water effectively, making professional inspection essential after significant hail events.

Wind and Uplift Damage

High winds create uplift forces that can loosen or remove roofing materials even when no obvious damage is visible from ground level. Wind damage often affects roof edges, corners, and ridge areas where uplift forces are greatest. Loose or partially displaced materials might not be immediately obvious but create vulnerability to future weather events and require professional evaluation to ensure proper attachment.

Timing and Professional Assessment

Understanding when to seek professional evaluation helps homeowners balance the costs of inspection with the risks of undetected damage progression. Professional roof repair contractors provide expertise and equipment that ensure accurate damage assessment and appropriate repair recommendations.

Regular Inspection Schedules

Annual professional roof inspections provide baseline assessments that help identify gradual deterioration before it becomes critical. These routine inspections are particularly valuable for older roofing systems or homes in areas with severe weather exposure. The modest cost of annual inspections often prevents much more expensive emergency repairs by identifying problems in their early stages.

Emergency Assessment Situations

Certain situations require immediate professional assessment regardless of routine inspection schedules. Active leaks, visible structural damage, or safety concerns about roof stability demand prompt professional evaluation to prevent progressive damage and ensure occupant safety. Emergency situations often require temporary protection measures while permanent repairs are planned and executed.

Insurance and Documentation Considerations

Professional roof inspections provide documentation that supports insurance claims and helps establish maintenance records that demonstrate responsible property stewardship. Many insurance companies require professional assessment and certification for roof damage claims, particularly those related to weather events or age-related deterioration. Working with qualified roof repair contractors ensures that inspections meet insurance requirements and provide appropriate documentation for claim processing.

Recognizing roof damage in its early stages empowers homeowners to take proactive steps that prevent minor problems from becoming major disasters. While some damage indicators are obvious, many serious roofing problems develop gradually and require trained eyes to identify before they cause extensive property damage or safety hazards. Regular attention to these warning signs, combined with professional assessment when concerns arise, protects both your property investment and your family’s safety.

Is There Mold Gorwing In Your Attic?

Attic mold is one of the most common—and overlooked—issues in residential homes. Because most homeowners rarely enter their attic, mold can grow unnoticed for months or even years. By the time you smell it or see stains on your ceiling, the damage may already be significant. The good news? Early detection can save you thousands of dollars in repairs and keep your home safe and healthy.

So, how do you know if there’s mold growing in your attic? Let’s walk through the telltale signs, what causes it, and what you can do if you suspect a problem.

1. Warning Signs You Might Have Attic Mold

Musty Odors That Don’t Go Away

A persistent musty smell upstairs or near attic access points is often the first clue. Attic mold releases microbial volatile organic compounds (MVOCs), which produce that earthy, damp smell—especially in warm, humid conditions.

Staining on Ceilings or Walls

Brown or black water stains on the top-floor ceiling may point to mold activity above. These marks usually appear where roof leaks or condensation are allowing moisture to build up behind the drywall.

Visible Mold on Wood or Insulation

If you venture into the attic and see black, green, or white patches on the rafters, plywood, or insulation, that’s a red flag. Mold often looks fuzzy or powdery and thrives on organic materials like wood, especially when damp.

Increased Allergy or Respiratory Symptoms

If family members start experiencing sneezing, coughing, or eye irritation that worsens indoors—especially near attic spaces—mold could be circulating through your HVAC system or air leaks.

2. What Causes Mold to Grow in the Attic?

Poor Ventilation

Attics need steady airflow to stay dry. If soffit or ridge vents are blocked by insulation, dust, or even bird nests, moisture can’t escape. This creates a humid environment where mold thrives—especially in winter when warm indoor air meets cold roof surfaces.

Roof Leaks and Flashing Issues

Even minor leaks around chimneys, vents, or roof joints can introduce enough moisture for mold to take hold. These leaks are often slow and hidden, soaking insulation or framing before you notice.

Unvented Bathroom or Kitchen Fans

Exhaust fans should vent directly outdoors—not into the attic. When hot, moist air from showers or cooking ends up in the attic instead, it raises humidity levels significantly, speeding up mold growth.

Poorly Sealed Ceiling Gaps

Warm air escapes through gaps around light fixtures, attic hatches, and ductwork. When this air hits a cold attic roof, it condenses, adding to the moisture load and encouraging mold growth.

3. Why Mold in the Attic Is a Serious Problem

It Spreads Quickly

Once mold finds a food source—like wood or dust—it can spread across surfaces rapidly, especially in warm, moist conditions. If not addressed, it can move into insulation and even travel into your HVAC system.

It Can Damage Your Home’s Structure

Mold weakens the structural integrity of attic framing, sheathing, and trusses by feeding on cellulose in the wood. Over time, this can lead to sagging, rot, and expensive repairs.

It Affects Indoor Air Quality

Spores from attic mold don’t always stay in the attic. Through air leaks, they can enter your living space, triggering allergies, asthma, and respiratory irritation, especially in sensitive individuals.

It Reduces Energy Efficiency

Contaminated insulation can lose its effectiveness, making your HVAC system work harder. Moisture-damaged materials also affect your home’s ability to regulate temperature, leading to higher utility bills.

4. How to Check Your Attic for Mold

Do a Visual Inspection

Use a flashlight and safely check your attic for discoloration on rafters, plywood, insulation, and ventilation ducts. Mold often appears in dark, damp corners and around venting areas.

Look for Moisture Sources

Check for signs of water intrusion: wet insulation, rusted nails, or warped wood. Also inspect around bathroom fan exhausts and plumbing stacks for condensation or leaks.

Measure Humidity Levels

Use a digital hygrometer to check humidity. If it’s consistently above 60%, your attic may be at risk. Healthy attic humidity levels should stay between 30% and 50%.

Consider Professional Testing

If you see suspicious spots or smell mold but aren’t sure, a mold inspection service can conduct air or surface sampling to confirm whether mold is present and what type.

5. What to Do If You Find Mold in Your Attic

Don’t Panic—but Don’t Ignore It

Small areas of surface mold can sometimes be cleaned with safe DIY solutions like vinegar or commercial mold removers. Always wear protective gear and isolate the area to prevent spore spread.

Call a Mold Remediation Expert for Larger Issues

If the mold covers more than 10 square feet, or if you’re unsure of the source, it’s best to call a licensed remediation company. They’ll remove the mold safely, fix the moisture source, and verify cleanup with post-treatment testing.

Repair the Root Cause

Removing mold isn’t enough—addressing the cause is critical. Fix leaky roofs, unblock vents, seal gaps, and ensure bathroom fans are venting outside to keep your attic dry and mold-free.

Don’t Let Mold Hide in Plain Sight

Attic mold often goes unnoticed until it’s already caused damage—but you don’t have to be caught off guard. By recognizing the early warning signs, understanding what causes mold, and checking your attic regularly, you can stop a small problem from becoming a major repair. Prevention is always easier—and cheaper—than remediation.

What is Underpinning? A Homeowner’s Guide to Strengthening Foundations

As a homeowner, you want to ensure that your home is built on a solid foundation that can withstand the test of time. However, various factors such as soil erosion, changes in moisture levels, or structural issues can compromise the integrity of your home’s foundation. One solution to address these problems is underpinning. In this blog post, we’ll explore what underpinning is, when it’s necessary, and how it can help strengthen your home’s foundation.

Understanding Underpinning

Underpinning is a process of reinforcing and stabilizing the foundation of a building or structure. It involves excavating the soil beneath the existing foundation and installing new supports, such as concrete piers or steel posts, to transfer the load of the building to more stable soil or bedrock. Underpinning can be done using various methods, depending on the specific needs of the structure and the soil conditions.

When Is Underpinning Necessary?

There are several situations where underpinning may be necessary to protect and strengthen your home’s foundation:

  1. Foundation settlement: If you notice cracks in your walls, uneven floors, or doors and windows that no longer fit properly, your home may be experiencing foundation settlement. Underpinning can help stabilize the foundation and prevent further settling.
  2. Soil erosion: Changes in soil moisture levels, such as heavy rainfall or prolonged drought, can cause soil erosion around your home’s foundation. Underpinning can provide additional support to prevent the foundation from shifting or sinking.
  3. Structural additions: If you plan to add an extra story, a room extension, or a heavy load to your existing structure, underpinning may be necessary to ensure that the foundation can support the added weight.
  4. Basement lowering: In cities like Toronto, where space is at a premium, some homeowners opt for basement lowering to increase their living space. Underpinning is a crucial part of this process, as it reinforces the foundation walls and prevents structural damage during excavation.
  5. Seismic retrofitting: In areas prone to earthquakes, underpinning can be used to strengthen the foundation and improve the structure’s resistance to seismic activity.

Benefits of Underpinning

Underpinning offers several benefits for homeowners looking to strengthen their home’s foundation:

  1. Increased stability: By transferring the load of the structure to more stable soil or bedrock, underpinning can significantly improve the stability of your home’s foundation.
  2. Prevention of further damage: Underpinning can help prevent further settling, cracking, or structural damage caused by foundation issues.
  3. Enhanced property value: A solid, well-maintained foundation can increase the value of your property and make it more attractive to potential buyers.
  4. Peace of mind: Knowing that your home’s foundation is properly supported and stabilized can provide peace of mind and help you feel more secure in your living space.

Choosing the Right Underpinning Method

There are several underpinning methods available, each with its own advantages and disadvantages. Some common methods include:

  1. Mass concrete underpinning: This involves excavating sections of the foundation and pouring concrete to create new supporting piers.
  2. Beam and base underpinning: Steel or concrete beams are installed beneath the existing foundation, and then supported by new concrete bases.
  3. Mini-piled underpinning: Small-diameter piles are driven deep into the ground and connected to the existing foundation to provide additional support.
  4. Resin injection underpinning: A special resin is injected into the soil beneath the foundation to stabilize and strengthen it.

The choice of underpinning method will depend on factors such as the type of foundation, soil conditions, the extent of the damage, and budget constraints. It’s essential to consult with a professional structural engineer or underpinning contractor to determine the best approach for your specific situation.

Underpinning is a valuable solution for homeowners looking to strengthen and stabilize their home’s foundation. By understanding when underpinning is necessary and the benefits it offers, you can make an informed decision about whether it’s the right choice for your home. If you suspect your home may need underpinning, don’t hesitate to reach out to a professional for an assessment and guidance on the best course of action.

How to Spot Mold Before It Becomes a Serious Problem

Mold is a common issue that can quickly escalate into a severe problem if left unchecked. Not only can mold cause structural damage to your property, but it can also pose significant health risks to you and your loved ones. The key to preventing mold from becoming a serious issue is early detection and prompt action. In this blog post, we’ll discuss how to spot mold before it gets out of hand and what steps you can take to address it.

Common Signs of Mold Growth

Mold can grow in various places within your home or workplace, often in areas with high moisture levels or poor ventilation. To identify mold growth early on, keep an eye out for these common signs:

  1. Visible mold: Look for any visible signs of mold growth, which may appear as black, green, brown, or white patches on walls, ceilings, floors, or furniture.
  2. Musty odors: Mold often produces a distinct musty smell, even when not visible. If you notice a persistent musty odor in a particular area, it may indicate the presence of mold.
  3. Water stains or discoloration: Mold thrives in damp environments, so water stains or discoloration on walls, ceilings, or floors can be a sign of moisture issues that may lead to mold growth.
  4. Peeling or bubbling paint or wallpaper: If moisture is trapped behind paint or wallpaper, it can cause the surface to peel, bubble, or crack, providing an ideal environment for mold to grow.
  5. Allergy symptoms: If you or someone in your household experiences persistent allergy-like symptoms, such as sneezing, runny nose, itchy eyes, or skin irritation, it may be a sign of mold exposure.

High-Risk Areas for Mold Growth

Certain areas within your home or workplace are more susceptible to mold growth due to their higher moisture levels or lack of proper ventilation. Pay extra attention to these high-risk areas:

  1. Bathrooms: Showers, bathtubs, and sinks create a humid environment that is perfect for mold growth. Regularly inspect bathroom surfaces, including grout lines and caulking, for any signs of mold.
  2. Kitchens: Similar to bathrooms, kitchens are prone to moisture buildup from cooking, dishwashing, and refrigerator condensation. Check under sinks, behind appliances, and in cabinets for mold growth.
  3. Basements and crawl spaces: These areas often have poor ventilation and are susceptible to moisture intrusion from groundwater, leaks, or flooding. Inspect walls, floors, and ceiling surfaces for signs of mold.
  4. Attics: Roof leaks, poor insulation, or inadequate ventilation can lead to moisture buildup and mold growth in attics. Regularly check for any signs of water damage or mold presence.
  5. HVAC systems: Mold can grow within heating, ventilation, and air conditioning systems, particularly if they are not properly maintained. Have your HVAC system inspected and cleaned regularly to prevent mold growth.

Addressing Mold Growth

If you suspect or discover mold growth in your home or workplace, it’s essential to address the issue promptly to prevent it from becoming a serious problem. Here are some steps you can take:

  1. Fix moisture issues: Identify and repair any leaks, water intrusion, or humidity problems to prevent further mold growth.
  2. Ventilate the affected area: Open windows and use fans to improve air circulation and help dry out the space.
  3. Clean small areas of mold: For minor mold growth on non-porous surfaces, you can often clean it yourself using a mixture of water and detergent or a commercial mold cleaner. Always wear protective gear, such as gloves and a face mask, when cleaning mold.
  4. Hire a professional for extensive mold growth: If the mold growth is extensive or if you suspect it may be affecting your health, contact a professional mold remediation company. They have the expertise, equipment, and techniques to safely and effectively remove mold and prevent its return.

Early detection is crucial in preventing mold from becoming a serious problem. By familiarizing yourself with the common signs of mold growth, paying extra attention to high-risk areas, and taking prompt action when mold is discovered, you can protect your property and the health of those who inhabit it. Remember, if you’re unsure about the extent of the mold growth or how to address it safely, always consult with a professional mold remediation company.

What is the Taylor Guitar Ebony Project?

What is the Guitar Ebony Project of Taylor all about? And, why should you care?

Isn’t it awesome seeing people or companies care for our mother earth? What I mean is that they use sustainable products to preserve the beauty and function of our land – those green trees, beautiful forests, and so on. Taylor is not only popularly known for producing and designing top-quality acoustic guitars made of superior tonewoods, but for showing their love and support to the environment as well.

Acoustic guitars are mostly made of woods, like rosewood, ebony, and mahogany, which come from tropical areas of the world. But if you will notice these days, the forests are in jeopardy due to various factors, including the absence of good governance and increasing patterns of the global ingestion.

Taylor deeply recognizes this issue, which is why they came up with Ebony project to help our forests maintain its look and health. Bob Taylor – the co-founder of Taylor guitars – had traveled the world to further know about the veracities of obtaining woods, starting from the various management practices to the various communities that depend on forest resources as a means of their support.

As a company that takes advantage of the aesthetic and functional use of forest resources, Taylor knows its responsibility to run in a legal, transparent way as well as to be a good agent and partner to its dealers. The Arts Music Store is one of the largest Taylor Guitar dealers in Canada.

What is Ebony Project?

Taylor Guitar Ebony Project is simply an interesting 8-part story digital experience. It takes people on a virtual excursion to Cameroon’s African country to discover more about the efforts of Taylor to upgrade the ebony trade after buying a swamsill way back in 2011. The story combines awesome shots of the Congo Basin Rainforest with photos, video interviews, and written storytelling. This offers people a deeper gratitude as well as the effort involved in obtaining ebony that was used for crafting music instruments.

Also, included in the Ebony project is the path of Taylor towards more sustainable sourcing methods of ebony – starting from the decision to co-procure the Crelicam ebony sawmill through Spanish wood dealer Madinter to the quest for innovative research about the ecology of ebony to the upgrading the operation of milling. All of these had resulted in a groundbreaking community planting programs with the goal of putting thousands of ebony trees within the ground for more than years. Moreover, the Ebony project of Taylor gives emphasis on the importance of giving the Crelicam neighbors of Taylor the training and tools needed for improving their financial living and generating a more sustainable future for their own families as well as to their native communities.

Bob Taylor is one of the main storytellers in the various videos featured on the Taylor Guitar Ebony project. According to him, has the confidence and dedication to make a better future for ebony along with their Crelucam partner Madinter. For over 44 years of being in the guitar companies, he is happy providing clients (specifically musicians and guitarists) with the high-quality products suitable to their budget and personal requirements – of course, while improving the lifecycle of ebony.

A former Director at Greenpeace and the Director of Natural Resources Sustainability, Scott Paul, is also part of the project and has appeared in numerous video segments. He added perceptions with regard to a community-based ebony replanting inventiveness that is being established as a part of the assorted model of Cameroon’s agroforestry. Scott Paul also stressed that products such as acoustic guitars offer an exceptionally persuasive platform to support sustainable practices for the coming years.

With its aesthetic look and sturdiness, ebony has been one of the most popular woods that manufacturers used for designing stringed musical instruments like acoustic guitars. As a company that merely depends on ebony and any other tropical tonewoods to designs various guitars, Taylor clearly understands that it has a huge responsibility to be a virtuous agent of these important natural resources to promote sustainability.

Bob Taylor and its team hope that with their Ebony project, they can be able to provide everyone with a deeper knowledge of where ebony comes from (its ecosystems and lives) and why it is important to develop a replant program.

Home Improvements That Provide The Most Value To Your Home

Thinking about making renovations to your home?  Are you wondering what kind of value these improvements will have on the value of your home?  Whether you are thinking of selling your home in the near future or just want to know how much your renovations will improve you home’s value, it’s always good to know what kind of ROI you will get from your investment.

The Kitchen.  The kitchen is the cornerstone of any home, it’s the gathering place for the family and cooking a meal is something that brings people together.  Kitchens can be expensive to renovate, but it is also the room that makes or breaks a home sale.  Sites like Pinterest make it easy to build a vision board to see what the latest options are.

Bathroom.  After the kitchen, the bathroom is the sanctuary for most home owners.  Where else do you escape to for a warm bath and some much needed quiet time?  A nice bathroom remodel can turn a room used for utility (using the john) to an oasis you can escape to when you need some much needed quiet time.

Square Footage.  Adding more square footage to your home will add value to your home as one of the most used real estate metric when valuing a home is the square footage.  If you have the land you can build an extension, if not, you can either go up or down.  Dave Steinberg of Nusite Group, a basement waterproofing company in Toronto, says that renovating a basement has many advantages as you do not need to add on to a house, losing outdoor space, but you most often do not need a permit as you are just improving an existing space.

New deck.  A beautiful deck allows you to enjoy your outdoor space in style.  It allows you to sit and relax and enjoy the sanctuary that is your backyard.  Wood decks are relatively inexpensive to build (unless you get really fancy), you can also build a concrete deck, which is more money, but will add more value and style to you backyard.

The infographic below shows some examples of home improvements and the value you can expect to get out of each one.


Home IMprovement Value Infographic